Doing the shading on a drawing
You’ve finally mastered the art of getting proper proportions, you’ve drawn several different cars already, and now you are finally ready to take it up a notch and make an even more realistic and authentic looking drawing of a car. This step up is going to require knowledge and appropriate use of shading. Surprisingly, shading can be done with more than just pencils, including markers, charcoal, and even sharpies. The following is an overview of all the steps you should take as you begin to shade your car drawing.
Obviously you will first need a general sketch of a car. This can be done with an overlay of another of your drawings, or simply beginning a new sketch. Once this sketch is complete, choose your colors appropriately for the perfectly shaded car. Remember to have multiple shades of each color to further increase the amount of shading you can accomplish.
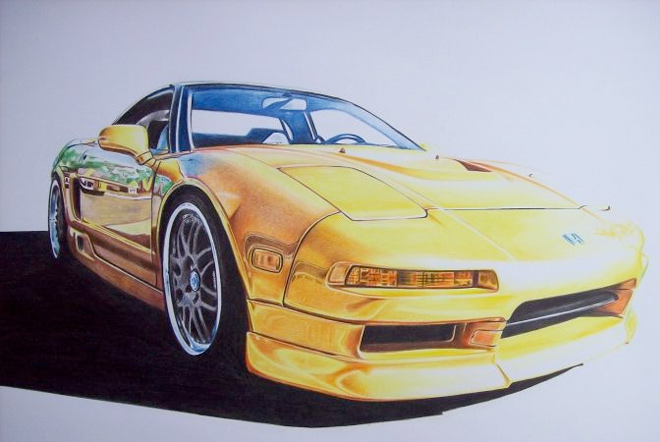
The first places you should begin shading are those that will be darker, such as beneath the vehicle, areas of the front bumper, and the tire areas – but not the tires themselves just yet. All of these areas can be done with the same shade, preferably a dark black. The windows and hood of the vehicle can also be done with black, but you may want to only shade in parts of the windows for effect.
Now that you have several areas shaded in, it’s time to decide on your main color. This will be used on the majority of the vehicle, and you should have multiple shades of it, or be able to use varying layers to create the desired effect. For example, the side view facing you of your image will have a darker color towards the bottom, and become lighter as it goes up towards the driver side window.
If you have any areas that have unique features along with the dominant color, be sure to shade in the dominant color, and then return to add in the various features. Also, as you continue shading, remember to use a continuous motion going the same way to prevent a choppy effect from appearing.
Some areas, such as the hood of the vehicle, can be accomplished by shading with a pencil, and then rubbing with a thumb or forefinger to create a much different shading technique then if you shaded in for multiple layers. Fortunately, this can also be done with other colors, such as your car’s dominant color, but make sure any other colors are off of your fingers before moving to a new area with a different color. This effect can also be done by taking a rubber eraser to the area and rubbing in the general direction you want the color to spread, it will do so in a lighter shade and with a slightly spotty effect.
Lastly, since shading is used primarily for depth perception, it should be applied appropriately to the underside and around the car you have drawn. Once you are finished, you don’t want to have a car that seems as though it is floating in a sea of white. Instead, sketch lightly underneath the vehicle to give the appearance of a shadow. The shadow should not extend too far beyond the vehicle, and should not be very dark either. It is more like a hint of the vehicle that is above it, no darker than how you would normally write with your personal.
There you have it, the general rules for shading the various parts of your vehicle. For some of the more complicated areas, such as head lights, tail lights, and wheels, you may want to continue to review and experiment until you find what works best.