Drawing cars with Markers
While drawing cars with pencils can be difficult, drawing cars using markers employs an entirely different method. Granted, you will want to use some of the same steps as you do when drawing with pencil, but with a few changes considering you are now using color and a medium that cannot be erased.
Before going through the following step-by-step process, you will want to gather the appropriate materials. Find markers that have thin and thick ends, as well as a multitude of different shades for each color. Unlike with pencils, you cannot easily change the shade of the color when using markers. Granted, you can use multiple layers, but this may saturate the paper and cause issues with perception, which is why it is better to have the wide variety of shades for all of the colors you want to use, and especially for all of the gray areas.
Step-by-Step Using Markers
1. As with creating a pencil sketch, you will want to create some type of grid. Of course, if you do not have a light enough color, then you should go ahead and copy your reference image, unless you feel confident enough in your ability to create a freehand sketch of the image with a faint black marker.
2. Once you have created a simple outline of your car with a light gray marker, you will want to begin shading in some of the darker areas. Start with the underside of the car, the wheel base, as well as the bottom of the front bumper. This will provide your first contrast and should be the darkest area of the car to help provide the sense that it is right in front of you.
3. Now that you have your first contrast, use the lighter grays to add in the shading on the wheels themselves. Remember to highlight certain areas where the light would hit the wheels – don’t forget that this can be done by not placing any color in certain areas, but instead creating even darker areas around where you want the highlights to pop.
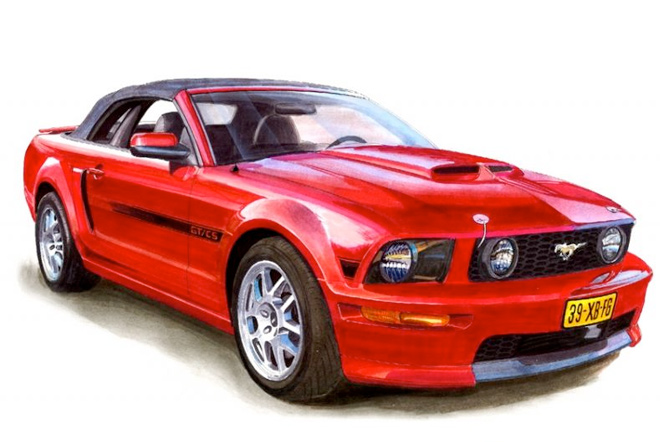
4. Using the main color of your car, such as red, gently color in with the darkest marker of that color on the front side of the vehicle. You should only color in the area between the two front wheels. The use of markers up to the windows will be added later.
5. After the main color has been added, start including the other details of the car with some of those grays you have. Create your windows however you would like them. This may mean having darkly tinted windows that cannot be seen through, having windows half down or marking in some of what is inside – the decision is completely up to you.
6. Since the windows have been added, you can return to using the markers of the various shades of your main color. Think of where the light is hitting the car – those areas will use a much lighter shade than areas that the light is not directly hitting.
7. Add any finishing details in the desired colors and view your new masterpiece done by using markers.
Remember that all artists make mistakes, and sometimes it is necessary to start over. Use the appropriate utensils, don’t forget to pay diligent attention to your reference images, and even start out by copying the reference image if needed. Also, since you are using markers, it is even more likely that you may have to start over several times since there is no way to erase. Try to avoid making the same mistake twice by keeping all of your drafts and improving upon each.